Monday, July 30, 2012

TS Monday - Sports and dotted technique tutorial!

***You can view my CAS guest designer card HERE***

Hi all and happy Monday!  This week over on the Totally Stampalicious blog, we are challenging you to make a sports themed card or project.  For my card, I've used one of the images from the A+ Bears set.  Yep, I used that "dotted" technique again and that tutorial I've been promising is below - but please bear (ha, pun not intended!) with my Instagram pics!  I did not have my camera handy and didn't want to wait to make the tutorial on a later date.  Some die-namics, brads and piercing are all the details this card needed.  The sketch is from the DTGD12Blondie090277 challenge on SCS.  


Now for the tutorial:

I like to do one section at a time, so I started with his head.  I use the lightest, or in this case, the second to lightest color(E33) that I plan to work with and start a "base".


Next, I take the next darkest color(E25) and add it where I want more shadows.  It's always best to know which direction your "light source" is coming from!  As you can see, I hardly added any of this color on the right side of his face because, for me, that's where my "light source" was hitting him.


Then I add an even darker color(E37).  I try to stay light handed so that my dots don't look like big blotches.


And yet, an even darker color(E29)!


Finally, I go back with the first color I started with and start filling in still using a dot motion (not brush strokes).  For this one, I went with an even lighter color (E31) to fill any spots that were left.  I just keep dotting away until I'm happy with the shading.


And here he is all done before I added to my card...


I hope you found my tutorial easy and inspiring enough to give this technique a try!  It's fun to color using different techniques!

Have a fabulous week!!!

Sunday, July 29, 2012

CAS guest designer!

Hi all!  I'm so excited to be this week's CAS {Clean And Simple} guest designer over on SCS!  The challenge this week is to make a tent card or a tent topper card.  Here is my tent topper using the MFT set Inspired by Lighthouses.  I love the gorgeous images in this set, along with the sweet sentiments.  I colored my image with copics then cut it out using Circle STAX 1 and STAX 2.  The base of the card measures 4 1/4" square when folded, so when you add your "topper" you want it to come over the top of the card just enough to make it measure 5 1/2" so that it ends up being a standard A2 card size (4 1/4 x 5 1/2).  The white layer on the base was cut out using Square STAX 1.  I added my sentiment, some twine and a button to finish it all up!


Detail shot:


Thanks SO much for stopping by!  See you soon!


Monday, July 23, 2012

TS Monday - Texture

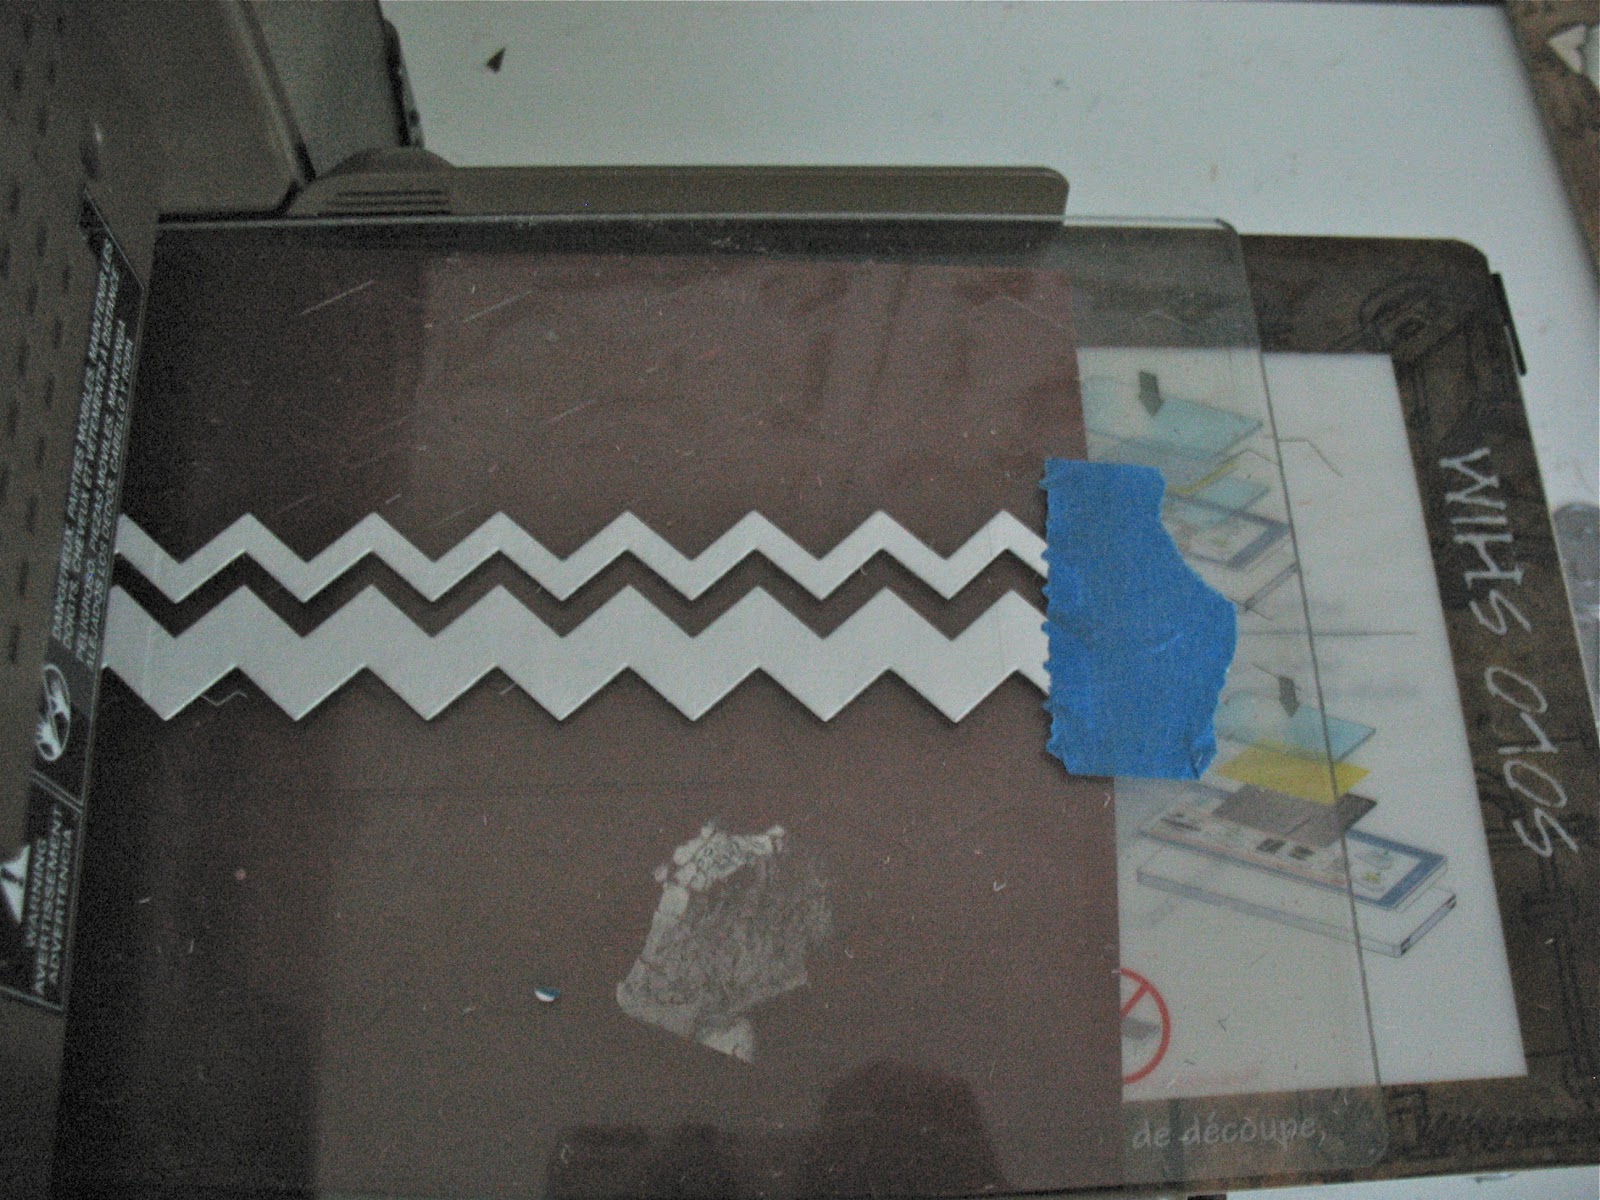
Hi all!  The Totally Stampalicious challenge this week is texture.  For my card, I decided to use Gus Mantastic.  He's colored with copics and was cut out using my Traditional Tags Stax.  The sketch is from the MFTWSC81.  Besides piercing, I also added texture by using my Chevron Stripes die-namics to do my own embossing design.


Here's a close up of the embossing done by cutting a thicker cardboard type of material (a little thicker than the backing of SU designer paper packs) using my Chevron Stripes die-namics...


And here's what the cardboard Chevron stripes look like on my vagabond.  I lined them up then adhered them using painter's tape.  Not pretty, but it worked.  ;)  So now, I can make my own embossing designs using almost any die-namics I want!  Yay!


Thanks for stopping by!

Saturday, July 21, 2012

Bugaboo Christmas in July Blog Hop winner!!!!

Hi all, just a quick post to announce the winner of the Snowman Polka Scarf digi:

Random.org chose #3:

Margret who said:  Great paper you used! Lovely card.
Margret
Congrats!!!!  Margret, I simply need your email address so that I can send you your digi file!


Monday, July 16, 2012

TS Monday - Christmas in July

Hi all and happy Monday!  This week on the Totally Stampalicious blog, we're continuing the Bugaboo Christmas in July celebration by challenging you to make yet another Christmas project!  For my card, I've inked up the Deacon Elf.  He's so sweet and fun to color, I couldn't resist!  I fussy cut him and popped him up on pop dots.  The sentiment is from the Winter bird Snowman image.  I added some swirly bling to add to that 'magical' feeling, as the sentiment says.  The sketch is the SC393 on SCS.


Thanks for stopping by!  Have a great week!  And yes, that dotted tutorial is coming - promise, promise!  These boys are keeping me busy this summer!  ;)


Saturday, July 14, 2012

Bugaboo Christmas in July Blog Hop!!!

Hi and welcome to the Bugaboo Christmas in July Blog Hop!!!  You should have arrived from Amy's Blog, but if you didn't, you can start at the beginning, which is Jodie Mackrell's Blog!  Did I mention that if you leave a little love, you have a chance to win on EVERY blog???!!!!  Wahoo!!!  I just looove Christmas in July because it helps me get a jump start on my Christmas cards!  For my card, I decided to use this sweet Snowman polka scarf digi.  He's colored with copics, then I masked him and sponged some baja ink for the sky.  


Some twine, a button, silver brads and several die-namics (including some flower "snowflakes" in white felt) add the finishing touches.  The sentiment is from the Totally Stampalicious set, Deacon Elf.  Now it's time to head to Becky G's blog to see the Christmas goodie she has created!

Be sure to check out the Catch the Bug Blog for a week long Christmas Celebration of challenges and prizes!!

Thanks for stopping by and have fun on the rest of the hop!

Monday, July 9, 2012

Totally Stampalicious Monday challenge

Hi all!  This week, the Totally Stampalicious team and I are challenging you to use your FAVE embellishment!!!  This adorable Sean Dog image was already inked up, so how could I resist using it?  If you were to ask what my fave embellie is, the first thing I'd say is piercing!!!!  I'm not sure that it really qualifies as an embellishment, but to me, it definitely does because it just adds the. perfect. touch. when I'm not sure what else to add.  Second on my list would be brads!  And then there are my die-namics.  {loving *sigh*}  They're embellishments, right?!?!  Really, they would be #1 on my list but again, do they qualify??  Ha, thinking too much about it!  My image was colored with copics, then I drew in some grass and added dirt using that dotted technique (tutorial coming THIS WEEK!).  I also used some MFT clouds as a mask to sponge in the sky.


Detail shot...  forgot to mention my love of twine!  :)


And the inside...  I love adding my scraps to dress up the inside of a card.  The border I used on the inside is the negative of the border I attached to the front of the card.  And the star on the inside is a leftover from the stacking stars die-namic.


Thanks for stopping by!  See you soon!


BLOGGER TEMPLATE BY DESIGNER BLOGS