HI all! Here's a card I made for the MFT Stamps Summer School 2018 Day 1 challenge: White Space. Well, my 'white space' is kraft colored :) I used an image from the BB You Gnome Me stamp set with a sentiment from the retired Sweet Forest Friends set. I used a (retired) Pierced Circle STAX die-namic to emboss the card base then layered the image over it creating a highlight. A trio of clear sequins add a little something extra, as do the rounded corners.
Thanks for stopping by!
Hugs,
Angel
Showing posts with label BRI sequins. Show all posts
Showing posts with label BRI sequins. Show all posts
Wednesday, July 4, 2018
Wednesday, May 2, 2018
The Card Concept Challenge Time!
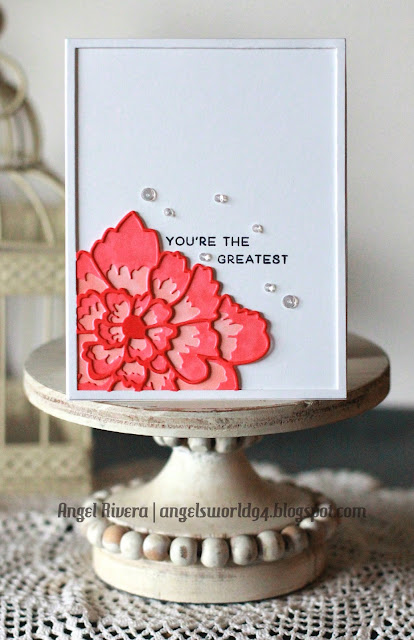
Hi all! Welcome to a new challenge on The Card Concept Challenge Blog! I broke out some Birch Press Designs cover plate dies and stamps. I used the three Peony Bloom Layer cover plates and smooth white cardstock to start. I then cut out one of the flowers and used Copic markers to color the flower that I kept. Mom, if you're reading this look away because this is your Mother's Day card! ;) The sentiment is from the Dragonfly Greetings set. I used my Mini Misti to separate it since it is all on one line.

We would love for you to play along with us!
Thanks for stopping by!
Hugs,
Angel
Wednesday, February 7, 2018
The Card Concept Challenge Blog
Hi all! It's time for a new challenge on The Card Concept Challenge Blog. The inspiration pic is so pretty and girly! I used the MFT More Rustic Flowers set to stamp flowers to create the background. The sentiment is from the Handwritten Happiness stamp set. I used a few MFT die-namics for the sentiment and background layers. And to make it even more 'girly', I added some clear sequins.
We hope you'll play along with us!
Hugs,
Angel
We hope you'll play along with us!
Hugs,
Angel
Labels:
birthday,
BRI sequins,
flowers,
MFT,
mft die-namics,
MFT stamps,
The Card Concept,
wish
Thursday, August 17, 2017
Pretty in Pink
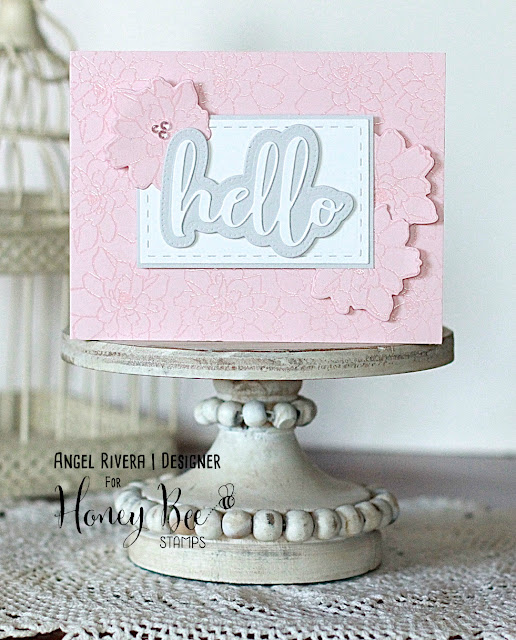
HI all! Happy Thursday - yes, I'm posting a day late ;) Almost Friday!!! I have a pretty in pink Hello card for you today using the following Honey Bee Stamps products: Lotus Blossom stamp and matching die, A2 Double Stitched Frames die, and the Hello dies. This little stamp sure can pack a big punch when embossed! I embossed the outer edge of my pink lemonade card base, then added a few extra around the sentiment. I love the layered Hello dies - such a cool look! I added a few sequins to the Lotus tucked under the 'hello'.
Thanks for stopping by!
Hugs,
Angel
Thanks for stopping by!
Hugs,
Angel
Labels:
BRI sequins,
embossing,
hello,
Honey Bee dies,
Honey Bee Stamps,
MFT cardstock
Friday, June 16, 2017
CAS-ual Fridays Challenge Time!
Hi all! It's time for a new challenge over on the CAS-ual Fridays Inspiration Challenge! I've always loved color challenges and that's what we have for you this week! I kept it super Clean And Simple for my card. I used the Modern Petals background stamp set with a sentiment from the Mon Ami stamp set.
Be sure to play along with use - you could win a $25 store credit!!! :)
Thanks for stopping by!
Hugs,
Angel
Be sure to play along with use - you could win a $25 store credit!!! :)
Thanks for stopping by!
Hugs,
Angel
Wednesday, June 7, 2017
The Card Concept Challenge Time
Hi all! Time for a new challenge on The Card Concept Challenge Blog! I used lots of MFT goodies including the Flashy Florals stamp set, the layered leaves dies and their Stitched Scallop Basic Edges 2 die-namics to name a few.
Thanks for stopping by! We hope you'll play along with us at The Card Concept!
Hugs,
Angel
Thanks for stopping by! We hope you'll play along with us at The Card Concept!
Hugs,
Angel
Labels:
BRI sequins,
die-namics,
floral,
MFT,
The Card Concept,
you're awesome
Wednesday, April 26, 2017
The Card Concept Challenge - Hello
Hi all! It's time for another challenge on The Card Concept Blog! You are sure to be inspired! I loved the colors and all of the flowers from the inspiration picture, so I broke out my Flashy Florals set from MFT. I added sequins to all of the flower centers. I cut out 'hello' die-namic three times - once with Sno Cone card stock, the other two with white card stock then staggered them slightly when adhering them so you can see a tiny bit of the Sno Cone card stock. The flower layer and card base are Primitive White card stock.
Thanks for stopping by!
Hugs,
Angel
Labels:
BRI sequins,
die-namics,
flowers,
hello,
MFT,
The Card Concept
Tuesday, July 26, 2016
Lil Inker Designs - New Release Blog Hop Day 3!!!
Hi all! Welcome to the final day of the Lil Inker Designs New Release Blog Hop!
How about this release, huh?!?? I told you it was going to be AWESOME!!! Hopefully you arrived here from Joy's Blog because you don't want to miss a thing! My card today features a few new goodies. The Alphabet Gems stamp set was previously released but NOW we have matching dies! YAY! I colored them with my Zig pens and an aqua brush. The happy birthday border die was cut a little differently. I only ran it through my machine so that it cut out 'birthday', then I used my paper trimmer to cut the rest straight across. Clear as mud? Lol - I can do a tutorial if needed ;-} The kraft layer was cut out with the super cool new quilted stitched spirals die! Oh, how I love that die! I adhered the Grapesicle layer over the kraft, die cut it, then attached it to the card base. And that little trio of hearts? Those are all from the Little Things stamp set. I added the gem letters and a few clear sequins. Voila!
Next up is my sweet and talented crafty friend, Lisa! Remember to comment along the way to be eligible for one of 3 $15 store credit prizes!
Hugs ~
Angel
Tuesday, October 13, 2015
Bring on the snow
Hi all! Ok, so I'm not really ready for snow, but this little guy on my card is! :D This is one of the many adorable images from the TAWS set Mistletoe Kisses. The sentiment is from Waddle Pals. I colored the snowman with Copics and layered him over a watercolored background. The sentiment was stamped with Sweet Tooth ink and embossed with clear ep. I added matching teal-ish and clear sequins for extra detail. I love this teal and Grapesicle color combo for Christmas cards! The sketch is from the SSSC290.
Thanks for stopping by! Hop over to the TAWS Blog for more inspiration!

Thanks for stopping by! Hop over to the TAWS Blog for more inspiration!

Labels:
BRI sequins,
copics,
die-namics,
embossing,
MFT STAX,
TAWS,
TAWSDT
Tuesday, September 15, 2015
Hip-hip-hooray!
Hi all! Here's a card I made using the TAWS FREE when you spend $40 set this month called Party Pooper. ;D It's such a super cute mini set! I colored this guy and the balloon with Copics then fussy cut them both and popped them up on foam adhesive. The sentiment is from the It's My Party set. I curved it on my acrylic block so that it went along with the curve of my circle die. A few pieces of sequins from the Caribbean selection add extra detail. The sketch is the SSSC286.
Thanks for stopping by! Swing by the TAWS Blog for more inspiration!

Saturday, August 29, 2015
Let's Party - TAWS Sneak Peek Day 2!
Hi all! It's Sneak Peek time over on the TAWS Blog - wahoo!!! This is such a fabulous release, so let's get to it! Today we are featuring the sentiment set called Big Time. Love, LOVE this set! So, you may have seen Francine's videos (here)on sponging using acetate. Well, I decided to try it with squares! I took a piece of acetate and cut out a square using dies. I then penciled on a straight line as a guide. After that, I just eye-balled where I placed my square and sponged from the outer edges in. It was fairly easy and rather therapeutic. :) Once that was done, I embossed 'Party' slightly off center, then added 'Let's' right above it. A few sequins and voila!
There is more to see over on the TAWS Blog! Check back every day for more peeks of different sets each day and then we have our big Blog Hop on Monday!!!
Thanks for stopping by!

There is more to see over on the TAWS Blog! Check back every day for more peeks of different sets each day and then we have our big Blog Hop on Monday!!!
Thanks for stopping by!

Labels:
BRI sequins,
die-namics,
MFT,
sponging,
STAX,
TAWS,
TAWSDT


