Showing posts with label tutorial. Show all posts

Thursday, March 21, 2013

An oldie but goodie - Felt Cup Coozie tutorial

Hi all!  I didn't want you to think I'd fallen off the face of the earth, so I thought I'd share this tutorial I did last May.  Incase you were wondering, I just completed my Series 7 class (to get securities licensed) and have the test coming up on Tuesday.  Um, can you say STUDY?!?!!  Because that's all I'll be doing until then!  Yep, definitely feeling OVERWHELMED and stressed.  I really, REALLY want to pass the first time around (and therefore, am putting a lot of pressure on myself).  *thanks for letting me vent and positive thoughts and prayers are greatly appreciated*  On to the tutorial...

 I recently had some inquiries about how I made my felt cup coozie which you can see in the post HERE, so I decided to make a picture tutorial.  Like I said, I used a regular Starbucks cup thingie (goodness, not sure of the name?).  It measures approximately 10 1/2" X 2 3/4" and as you can see, there is a slight curve to it so it fits onto cups nice and snug.  I used the Sour Apple Felt I purchased from MFT.  It's a wool/rayon blend and when I say it's high quality, I mean, it's high quality!  AND they have 18 beautiful colors of it!  Serious *swoon*!  Trust me, I've tried to use the cheap stuff you can get from the bigger stores and it falls apart and you can't use it with any types of dies.  Period.  Don't waste your money.  ;)  {and ignore those Royal leaves I cut out of the coozie, please!  I hate to waste perfectly good corrugated paper!}


Once you've cut out the template, you want to have at least an inch overlapping.  I just folded up the paper coozie to see how much of an overlap it normally has and eyeballed it from there.  


Then I folded up my well-loved paper piercing pad and pierced 4 little holes as a guide for my needle.  Stay away from the very edge.  {ignore my non-manicured nails, please!  ;)  }


Once you've sewn your "X", loop the needle around the thread to make your final knot.  The thread I used is a linen/hemp type that I got from Michael's but you can find it just about anywhere.


Pull the loop down and tighten it as close to the felt as possible, as you see here.


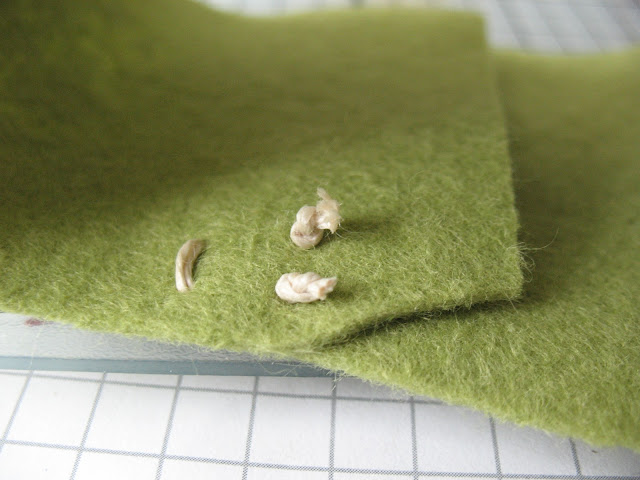
Then just cut off the excess thread.  Here's what the inside will look like...  And don't worry, it lays nice and flat once it's on your cup. 


One down, two more to go!  I originally only sewed two "X's", one at the top and one at the bottom, but once I slid it onto the cup, the middle kind of poked out, so a third "X" in the middle took care of that.  Plus, it just made it more sturdy.


And another peek at the finished result!  Now you're free to embellish it as you wish!


And here's a close up of the finished coozie!


Thanks for stopping by!


Monday, July 30, 2012

TS Monday - Sports and dotted technique tutorial!

***You can view my CAS guest designer card HERE***

Hi all and happy Monday!  This week over on the Totally Stampalicious blog, we are challenging you to make a sports themed card or project.  For my card, I've used one of the images from the A+ Bears set.  Yep, I used that "dotted" technique again and that tutorial I've been promising is below - but please bear (ha, pun not intended!) with my Instagram pics!  I did not have my camera handy and didn't want to wait to make the tutorial on a later date.  Some die-namics, brads and piercing are all the details this card needed.  The sketch is from the DTGD12Blondie090277 challenge on SCS.  


Now for the tutorial:

I like to do one section at a time, so I started with his head.  I use the lightest, or in this case, the second to lightest color(E33) that I plan to work with and start a "base".


Next, I take the next darkest color(E25) and add it where I want more shadows.  It's always best to know which direction your "light source" is coming from!  As you can see, I hardly added any of this color on the right side of his face because, for me, that's where my "light source" was hitting him.


Then I add an even darker color(E37).  I try to stay light handed so that my dots don't look like big blotches.


And yet, an even darker color(E29)!


Finally, I go back with the first color I started with and start filling in still using a dot motion (not brush strokes).  For this one, I went with an even lighter color (E31) to fill any spots that were left.  I just keep dotting away until I'm happy with the shading.


And here he is all done before I added to my card...


I hope you found my tutorial easy and inspiring enough to give this technique a try!  It's fun to color using different techniques!

Have a fabulous week!!!

Friday, May 25, 2012

Washi tape dp tutorial

Hi all!  Remember when I mentioned I'd be posting a tutorial on how I made the striped dp on my Gus Mantastic card that you can see HERE?  Well, here ya go!  This was SO EASY that I hesitate to call it a tutorial!  I bought this paper tape, aka washi tape, at Target in the office supply section.  They come in a pack of 4 rolls (different designs but same color scheme) for $4.  I hadn't used it before but was curious because it's become so popular.  All I did was take a piece of plain white cardstock and started lining up the tape.  Now because it's PAPER tape, you can reposition it and it won't tear the paper!  It took me minutes to line up the lines {my sporadic OCD kicked in!}.  Here's how it looked when I started...


And here's how it looked when I was done covering the paper.  You can either cut off the excess but I chose to just wrap around the other side of the cardstock.


And here's another pic of the finished card.  Yes, I used a corner rounder on my "washi dp" and it worked just fine!  


I hope I've inspired you to try paper tape!  Thanks for stopping by!


BLOGGER TEMPLATE BY DESIGNER BLOGS